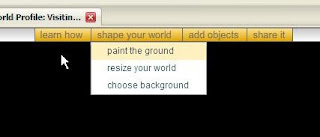
I'm going to open up my world first. You can see the world I'm using for this tutorial here -Tile placement. Across the top of the screen look for the yellow "shape your world" button. Click on it and then click on the "paint the ground" button.
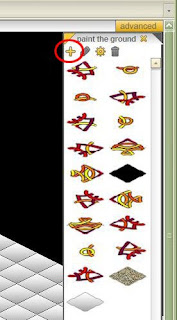
A side panel will open on the right hand side of the screen showing the tiles that are already loaded for your world. Look for the + sign at the top of this side panel. (I've circled it in red for you.)

Clicking on the + sign opens up a new sub-menu. Click on the triangle between the Y! and the words "What are you looking for?" You now see some more choices, including the one we're looking for "upload." Clicking on Upload calls up a new window. Within this window you can browse to the folder where you've saved your images. Select all of your images (use the Shift key to select a range of images at one time.) and then click OK.
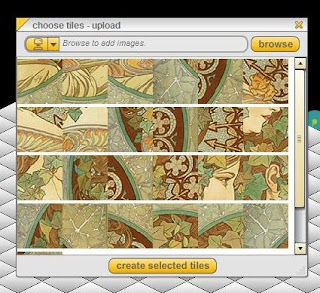
All of the tiles you selected will be displayed in a new window. At the bottom of that window click on the button that says "create selected tiles."
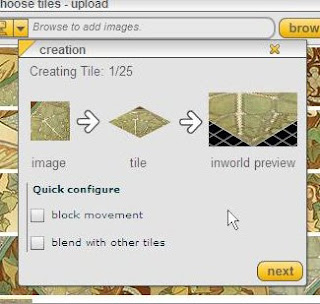
The system will now display each of those graphics as an image, a tile and an inworld preview. Just click on the "next" button and work your way through all of them. After you get to the last one the creation window closes and you are back in your world. Look in the "paint the ground" sidebar and you'll see all of your new tiles there.
It used to be that you would have to laboriously work your way through all of the tiles placing them one by one. Then Obo wrote a very useful plugin called Batch Map Paint. How do you get it? Along your top menu bar go to add objects > from marketplace. Then do a search for Batch Map Paint and buy that puppy!
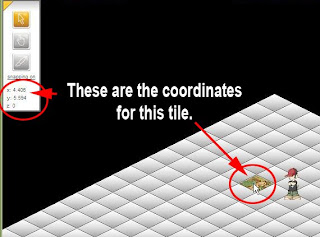
Now before we go any further you are going to need to know the coordinates of the tile where you want the image to be placed. In build mode click on the select object tool. Underneath it you will see a set of x & y coordinates that change as you move the cursor around the screen. (The picture makes this a bit more obvious.) Just round off the numbers. In this case that would be X=4 Y=5
Go ahead and open the console. To bring the console up, press the backtick (`) key in the upper left corner of most keyboards. To close the console, press enter while the console is active. On a UK keyboard layout ( ' ) opens the command line. Batch Map Paint requires you to enter the following
batch_map_paint prefix x y width height
Prefix is the base name that we used in back in Fireworks. In my case it was mucha
x and y are the map coordinates to begin painting we figured out this would be 4 5
width and height are the size of the area to paint. mucha was a 5x5 tile image
So in my case I would need to type:
batch_map_paint mucha 4 5 5 5
Hit the enter key and the magic happens! Now this may seem a bit complicated the first time or two you do it, but trust me it makes life a whole lot easier once you have got it down. Thanks again for creating the plugin Obo!


No comments:
Post a Comment