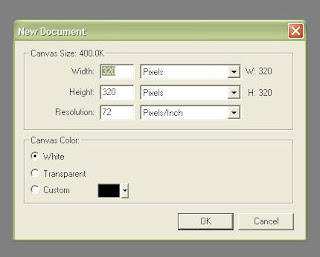
Fire up the program and go to File > New to create a new graphic. Set the size to 320x320 pixels and the resolution to 72dpi. It's important to set the size to a multiple of 64. Why? Because the tiles in Metaplace are 64x64. We'll be making an image that covers a grid 5 tiles tall by 5 tiles wide so we need our graphic to be 320 pixels square. (5x64=320) Set your canvas color to transparent and click the okay button.
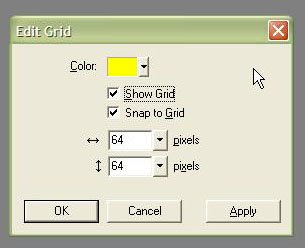
First off we want to set up our grid. Press Ctrl+Alt+G This will call up our Edit Grid window. We're setting a few things in here. (I cheated because although the screencap shows yellow as my color I changed it to red later. Doh!) From the top we have the color of the grid. Just set this to something bright that will stand out. Next make sure the check boxes are filled in next to "Show Grid" and "Snap to Grid." Finally set the size of the grid to 64x64 pixels. Now click on OK.

Now we need the Slice Tool. It is at the bottom right hand side of the Toolbox. I added a red outline in this picture to help point it out. Click on the Slice Tool to select it. Now go to the top left hand corner of your image. Click and hold the mouse button down and drag your cursor until it snaps to the first set of guides. (You'll end up with something like this.)
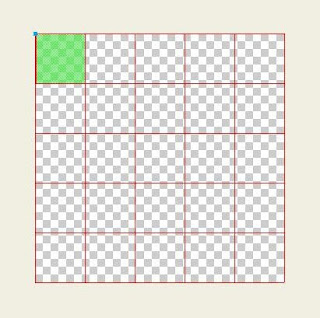
Continue working your way around the graphic until you have a slice for each of the 25 squares in your grid.
Now we're going to save the file. Why? Because it's a pain in the butt to draw all 25 slices and you shouldn't have to do it more than once. Hit Ctrl+Shift+S. Give it a nice simple descriptive name like 5x5floor. Now we have a handy 5x5 grid that we can use over and over.
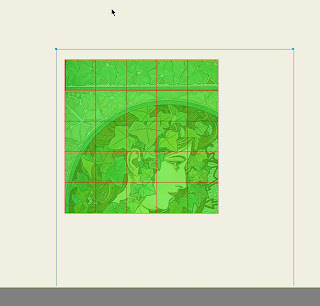
Next step Ctrl+R or File > Import. We're going to bring in a picture and get it ready for slicing. After you take that first step you'll notice a little corner indicator tool. Just click within your graphic and the image is imported. You can see in my screencap that the image is larger than our 5x5 graphic. Let's fix that. But first let's make things a bit easier to see. We're going to turn off the visibility of those slices.
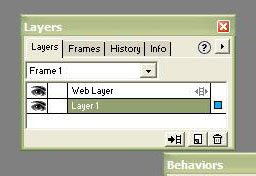
If your Layers palette is not already visible press Ctrl+Alt+L. Right now there should only be two layers: Layer 1 and Web Layer. Click on the eye graphic next to the words Web Layer. All the green stuff goes away! The slices are still there, they're just invisible for the moment. You can also still see the gridlines for a reference point if you need it.
Click on your imported image. (I'm using some great art by Alfons Mucha, btw.) Hit Ctrl+T. This puts you in transform mode. Just grab the corners of the rectangular guide and resize your imported image until it fits within the 5x5 grid. Be sure to hold down the Shift key while you're resizing so you don't stretch or squash the image. Hit Enter when you're done resizing.
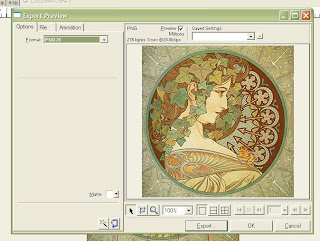
It's time to export our graphics. Go to File > Export Preview (Ctrl+Shift+X) Export Preview gives you more choices in the output of the final image and choice is good. Under the option tab set the file format to PNG24 (You can also output PNG32 files - which = alpha channels = equals floor tiles with transparencies!) Click on the Export button.
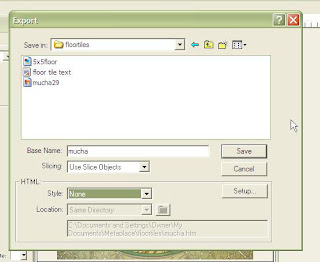
The next screen let's you pick the base name you want to use with the files and where you want it saved. I used mucha for my base name to help me remember what the tiles are about. Make sure that under Slicing it says Use slice objects. For HTML you can set the style to None since we just want the images. Click on Save. Whoo hoo, we're done! Fireworks has sliced up our graphic into 25 even pieces and even went ahead and named all of the files for us. If you check the destination folder you saved the files to you'll see a bunch of graphic with names like mucha_r1_c2.png. The software took the base name and added the row and column position of the tile. Why should we care? Because Obo created a swell plugin that will read that info and automatically lay our tiles out in the proper order. Next time I'll show you how to use that.

No comments:
Post a Comment