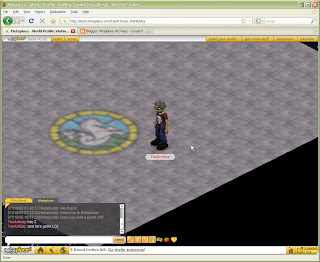
First thing I did was get a screen-grab of the room with the patch of light on the floor. I just find screen-grabs really helpful in making sure I've got objects sized right before I upload them to Metaplace.
I opened the image in Photoshop and created a new empty layer. On this layer I drew a number of colored blobs that matched the sections of floor beneath them. (The picture probably makes more sense than the written explanation for this little part.
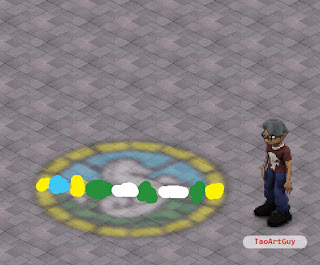
Go to Edit > Transform > Scale and stretch the blocks out until they are vertical stripes of color going from the top to the bottom of your screen.
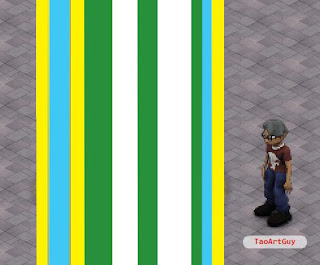
Go to Filter > Noise > Add Noise I used around 20%, Uniform Dsitribution and the monochromatic settings. Now Filter > Blur > Motion Blur with an angle of 90 degrees and a distance of 20 or so.
Now we're going to change the shape of the rays a little bit. Use Edit > Transform > Distort. Grab your corner control boxes and narrow the top of the box while stretching out the bottom. (Again, the picture should make more sense.) Lower the opacity of the stripes layer to about 30-40%.
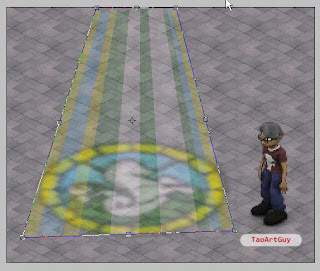
Now we're going to soften the rays up a little. Hit the D key to set your foreground and background colors to black & white. Click on the Add layer mask button.
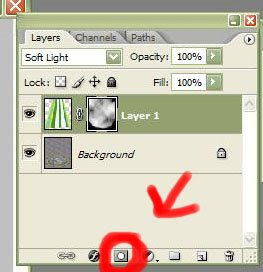
Now go to Filter > Render > Clouds. Let's tighten the contrast a bit. Use Ctrl+L to adjust your levels. Bring the right and left hand sliders in towards the center. Since the cloud function is random, just eyeball the effect you're getting until you see something you like. Switch to your brush tool, make sure you have a soft edge and paint some black over the lower edges of the graphic to match the curve of the circle of light (Once more: picture > convoluted verbage.)
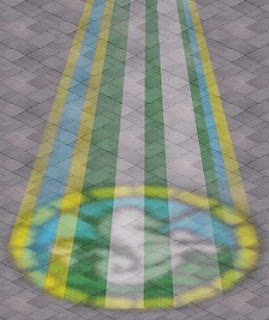
Turn off the visibility for your background layer. (The one that held the screen grab of the floor.)All you will be seeing if the colored stripes over a transparent bkg. Go to File > Save as wenter a name for the file and change the file type to PNG. This is important because the PNG file format will save all that lovely alpha channel info we just created. The graphic is all done. Let's bring it into your world!
Load your world in the web browser. Go to Advanced > Sprites. Click on the + sign to add a new sprite. Next to the phrase "What are you looking for?" click on the triangle to open the sub-menu, then click on upload. A new window will open, allowing you to browse to wherever you just stored that ray file on your computer. Select the file and click on open. On the next screen click on create selected sprites. Close your sprite window.
Go to the get more stuff menu. then click on new object. Click on the pick from your world button. Find your new stripey rays sprite. Double click it. Click on the create button and you new object is done. Tweak the size up or down as need to get the circle of rays the same size as the circle of light you already built into the floor. Sit back and enjoy your work!

No comments:
Post a Comment